This post contains affiliate links. Find out more about it here.
How to start a blog and make money!
You might have heard about this little thing called “blogging” by now, and how you can start a blog and make money from it. A few years ago, the whole idea took the internet by storm, then died down a bit, and is now back in full force as new bloggers pop up around the world each day.
And so, obviously, I thought to myself: “I need a piece of that!”.
Why?
Well, because of all the success stories, of course!
Since about five years ago until recently, I usually scoured Pinterest for blogging tips each day, trying to find the “secret recipe” or the “keys to blogging success”, and each day I would glance over a few Pins reading “how I made $10,000 blogging this month”. Or, “how I built a six figure income blog in 11 months”. Or, “how to start a blog that will make you money each month”…
Hold up! Let’s get back down to Earth real quick!
Let me mention a few reality checks here. (And I’m not trying to discourage you, by the way!) I really want you to go into starting your own blog with your eyes wide open. I don’t want you to set unrealistic expectations for your blog and, when it doesn’t turn out the way you want, you would simply give up and quit…
Reality check #1: Blogging is hard work. Sure, you might have heard this somewhere else already, but it’s true.
Reality check #2: Blogging can make you over $200,000 a month a lá CreateandGo.com. But you need to put a lot of effort in and have many different sources of income available on your blog + a winning recipe for success, strategies that work, and, and, and.
Reality check #3: You will have to be patient with your blog. This has been an absolute game-changing mindset for me. This is not my first blog, and I can tell you about the many successes and failures of my previous blog. Building a successful blog takes time. Time to write blog posts. Time to go viral on Pinterest. Time to rank in Google search. Time to make affiliate income… And so on.
Reality check #4: You need to actually write. And consistently. A blog will not do well without it’s content (blog posts). I don’t mean you have to write mediocre, 500 word blog posts and publish a ton of them each day. No! You need blog posts that are of high quality, high value, 2500+ words, with clear incentives and call to actions. (unless you want to start a blog just as a hobby, then it doesn’t matter what your do).
Reality check #5: You need to take your blog seriously from Day 1. Your blog is your business, and if you don’t treat it like one, it will fail.
So, why did I mention these few things to you just now?
Because the “success stories”, these “six-figure bloggers” of, all went through a struggle on their road to success. No one is born with the “secret recipe” to make money with a blog. It takes time, patience, research, planning, executing, failing and failing again, working super hard… Until you finally break through to get your blog to the point where it becomes your success story.
Luckily, I have done all of that for you, so that you can get there faster! So are you ready to do it? Let’s go!
How to start a blog + make some money!
Before dive into the whole shebang of starting a blog and making money from it, I just need to make one thing clear about this post: this tutorial is not for brand new, fresh-out-of-the-crib, learned-what-the-internet-is-yesterday kind of people. What I mean by this is, that you need to have basic knowledge about what a blog is, why people blog and why you want to start a blog.
Table of Contents
Before you start your blog...
The blog business plan
Unless you’re writing for passion, you should definitely treat your blog like a business. Having a blog business plan is not mandatory, of course, but it will help you to plan out your blog ahead, determine key strategies and pave the way towards blogging success.
If you have no clue where to start with your blog business plan, have a look at this post where I explain everything there is to know about this key process.
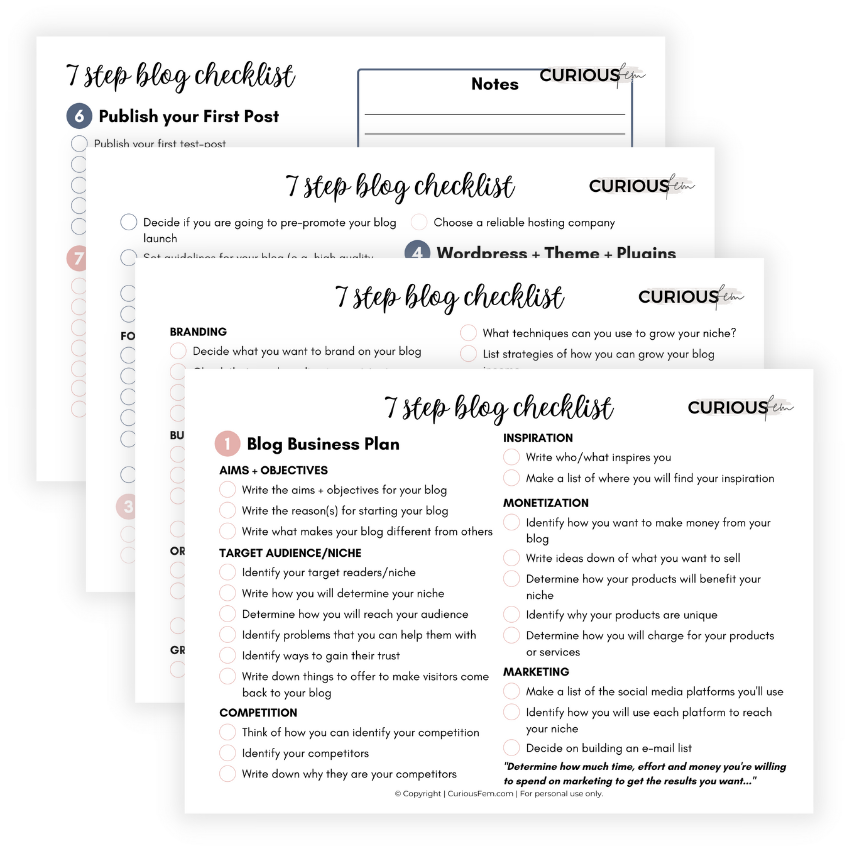
Or, skip all the reading and get my Blog Business Plan Workbook, which will help you to figure out your blog’s objectives, target audience, goals, monetization, promotional strategies, and more.
Your blog's launch strategy
If you want to get ahead in the “blogging game”, a blog launch strategy is the way to go. This strategy enables you to plan out exactly what you want your blog to be, who your blog is for, what it needs to have in place before going live, how you’re going to promote and monetize it, and so on.
It’s a little different than the blog business plan in that it’s shorter, and primarily focuses on everything you want to do before launching your blog, and how you want to launch it.
Like the blog business plan, the blog launch strategy is not mandatory, but it gives you a clear vision of your blog’s success and allows you to set goals and strategies in place based on that.
STEP 1: Your Domain Name + Web Hosting
Let’s dive right into the first step of starting a blog and making money from it: choosing what you’ll call your blog, and which company you want to host your blog with.
This is an important step, because unlike your niche, content, themes and plugins, it is much more complicated to change your domain name and hosting company (but not impossible).
Rather save yourself the headache and get it right from the start.
The importance of your blog's domain name
How important is your blog name really?
Well, quite important, actually. Some people will tell you it is and some will say the opposite. But your domain name is the “first name” of your blog. And what do you do meet someone new? You introduce yourself with your first name!In the same sense, you obviously want to introduce your blog to your audience, so make sure you have a good name!
Ask yourself this: Would you rather go to ‘kjagfoyuukrh25.com’ than ‘theknot.com’? No! The first one looks all spammy and unprofessional.
Actionable Step: Take your time to come up with at least 5, well thought out, domain names.
How do I choose a domain name?
If you are struggling to come up with any domain names, think of what is synonymous to your blog topic. For instance, if you decide on a wedding blog, words like dress, veil, venue, bride, groom, ring, I do, etc. comes to mind…
Next, think of how you can “decorate” one of those keywords with adverbs, adjectives or verbs to make it more meaningful and unique.
Pro Tip: You will more likely rank higher if your domain name includes a keyword that is frequently searched on Google. However, this isn’t the only ranking factor Google looks at. The search engine will also look at the type of content you post, you domain authority (how many other websites link to your blog) and which keywords you use in your posts.
Checking if it's available + buying a domain name
After you’ve decided on a domain name, you need to check if it is actually available. I buy all of my blog domain names on NameCheap. They have a search box where you can simply type in the domain name you wish to acquire and they will check the availability for you.
However, if you choose a reliable web hosting service, they should automatically check if the desired domain name is available once you sign up with them. It is easier to work with a hosting company instead of trying to set your website up through a private server. The hosting company will guide you through the steps and usually provide much needed support when you need it.
Web Hosting 101: What is web hosting?
A web hosting service or company hosts your website for you. To put it in a simple way: Imagine your website/blog is a house and the hosting service is the yard or plot that the house is built upon.
The web host makes use of servers, on which data (blog posts, images, etc.) is stored from multiple websites – including your blog’s website. That is why it is so important to make sure you choose the right one.
Web Hosting 102: Which hosting company is right for me?
When building a blog that’ll bring you extra income, a web hosting service should, no doubt, be reliable (a lot of down time can damage your website and make your traffic numbers go down). You also want a web hosting service that provides the best support when you need it – 24/7!
To get started with a 14-day free trial to build demo sites, and then for as little as $13 a month thereafter, I highly recommend that you check out FlyWheel. They specialize in WordPress sites and provide fantastic support, security and scalability – making it the best hosting platform for busy creatives!
STEP 2: Install WordPress, a theme + plugins
The next big step to take is to install WordPress.
Despite its bigger learning curve, I highly recommend WordPress, because it is more powerful to customize and build the blog you really want to make extra income. There are tons of themes and plugins available for WordPress as well.
Installing WordPress
After you have chosen your hosting company and paid your membership, you need to install WordPress. Your hosting company will have easy steps to follow to achieve this.
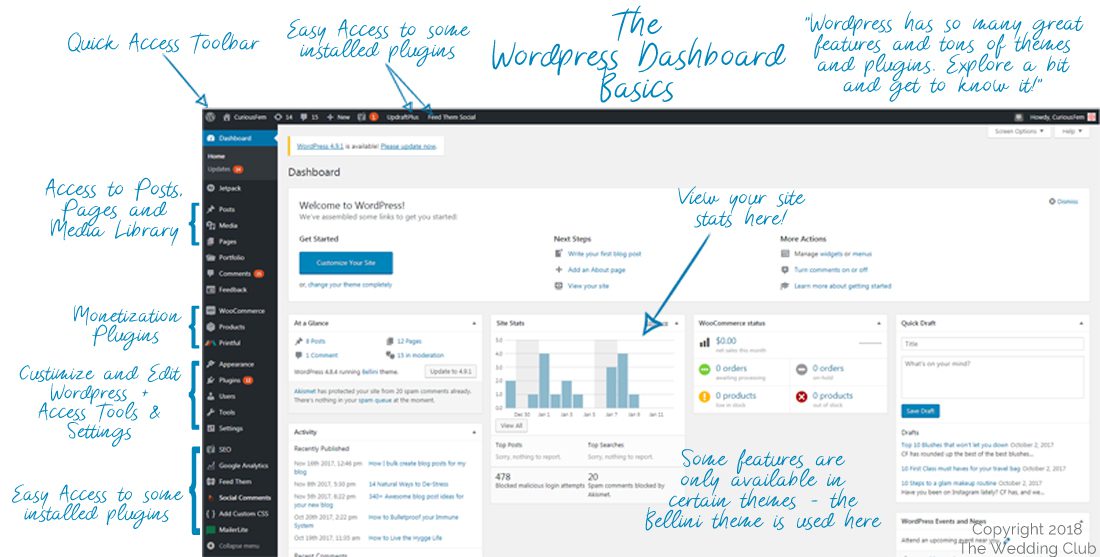
WordPress Admin Dashboard: The Basics
WordPress might look scary at first when you access the admin dashboard – but it is very easy to get used to. Knowing the basics of where to access what can be mastered quickly. It looks complicated when you are in the admin dashboard, because WordPress has so many great features. You can really create a virtual masterpiece with it!
This is an older screenshot of my other blog’s WordPress Dashboard. At first glance it looks quite complicated! However, I have plenty of plugins installed (which I’ll mention in a bit). Once you play around with WordPress, you’ll learn it quite quickly.
The Dashboard overview
Where to find what
Tabs and buttons are clearly named, so that you can easily find what you are looking for. If you are looking for all of your posts that you have published, for example, you will click on the “Posts” tab.
Creating and Publishing content
If you want to create a new blog post, page, etc., use the “+ New” button.
The Media Library
You can access your media library by clicking on the “Media Library” button. Here you can upload all sorts of media (images, video, files) in different formats. Depending on your hosting plan, the standard maximum upload size is 2 MB.
Pro Tip: If you want to upload a video, I highly recommend you create a YouTube channel and embed the videos into your blog posts from there (simply copy and paste the URL from the YouTube video into your post). If you want to add your video directly through the “Add Media” button, make sure it’s smaller than 2MB. You can use Handbrake (free) to make your videos smaller.
Customization Options
You can customize your site by using the different options in the “Appearance” tab. To customize your site’s header, colors, etc., go to Appearance > Customize. You can also manually edit and customize your site’s look by using the Theme Editor – you need to know CSS for this. (Learn CSShere.)
Tools and Settings
To change settings and features on WordPress, use these buttons. Never change something if you don’t know what it is.
Quick Access Toolbar
Most of the features that you will use will be available on the Quick Access Toolbar at the top. From here, you can add new posts and pages, access comments, preview your site, etc.
Admin settings and options
You can access the administrator settings on the top right corner of the dashboard. Change all of your info here. You can also set your WordPress Admin picture here – you will need a Gravatar account for this (free).
Adding another user
Adding another user is great if more than one person will write posts for your blog.
For instance, once your blog is up and running, you can start hiring additional writers to create more content. This is great if you have already started making some income from your blog, but need to grow even more.
Customize view
Once you decide to customize your site (Appearance > Customize), can normally change the following. Note that installing different themes will enable different features to be customized.
Header – The header is the top part of your site. It usually contains your logo and the navigation menu.
Footer – The footer is located at the bottom of your site.
Sidebar – Depending on the theme, your sidebar will be either on the left or right hand side of your site. It usually contains your blog categories, a search bar, calendar and archives. You can easily add and remove these features (and more) in all themes.
Widgets
Widgets can be placed in the header, footer and sidebar sections of your site. It is normally add-ons such as comment boxes, images, calendars, countdown timers, archives, social media links and buttons, etc. There are hundreds of widgets available out there, and some will automatically be included with certain themes.
Which WordPress theme is right for my blog?
When you first start out with your blog, I recommend that you go with a free or demo theme first, before buying a premium theme. There are lots of free themes on WordPress, but I do recommend you eventually upgrade to a premium theme, because the support and features are so much better for building your dream blog! Once you have fallen in love with a certain theme, you can look into upgrading that theme to a premium version, or get the Divi theme.
To get the most out of your blog by using WordPress, there are so many plugins available. A plugin is an additional “add on application” which you can install to access more features for your blog.
Some plugins run in the background to optimize your blog (increase speed, optimize images, etc.), others are accessible through the admin dashboard and help you to fully edit and customize your blog’s content (grid layout, editor plugins, etc.)
Here is a list of plugins I use to manage and run my sites:
Elementor – this is the #1 plugin you absolutely need to build beautiful pages and posts (if you use the free theme of OceanWP, they will also prompt you to install the free Elementor plugin)
Coming Soon Page Plugin – I love this plugin, because when I’m not ready to launch a blog yet, I can activate this plugin to show a “coming soon” page to anyone who comes to my site.
Disable comments – I have a love/hate relationship with the comments section of blog posts. I like to disable mine, because it decreases the amount of bots that want to spam me with nasty comments! However, Google might consider blog comments as a ranking factor, but this doesn’t mean that you’ll automatically jump to the #1 spot in search results if you have comments enabled (Google takes many ranking factors into account).
JetPack – Not all bloggers like JetPack, but it has personally never given me a reason to dislike it. There is a rumor that it can slow down your site’s speed, but I like that I can view my stats on my phone with the WordPress app as well as on my computer.
GDPR Cookie Consent – GDPR is one of those blog legalities that you definitely want in place. And, if you’re unsure about the whole thing, you can install this plugin for now to make users accept your cookie policy. I highly suggest you read up on GDPR as well, just to familiarize yourself.
Google XML Sitemaps – Use this plugin to greatly improve SEO to create special XML sitemaps which will help search engines like Google, Bing, Yahoo and Ask.com to better index your site.
Updraft Plus – It’s super important to frequently backup your site. This plugin will help you to schedule backups, where to store them, and restore your data with one click if your site crashes! This plugin is great for your own personal backups, but take note that a good hosting company should also create backups for you on a daily basis.
WooCommerce – If you plan on selling things on your blog, use the free WooCommerce plugin to add products and accept payments. Easy to learn, and plenty of tutorials on YouTube as well!
WP Forms Lite – If you have the free version of Elementor, you won’t be able to add forms with their pro widget. This is a great alternative to that and I recommend it if you want to create a contact page with a form.
Google Analytics – If you’re going to use Google Analytics to track your website data and traffic, this plugin will help you to set that up. This plugin enables Google Analytics for your entire WordPress site. Lightweight and fast with plenty of great features.
MailerLite Plugin + ConvertKit Plugin – I use both MailerLite and ConvertKit on my blogs for all my email newsletters and campaigns. These plugins allow me to effortlessly add opt-in forms with Elementor. If you’re using a different email service provider, they will likely have a plugin of their own.
Really Simple SSL – You need an SSL certificate to tell search engines (as well as users to your site) that your site is trustworthy and secure. Really Simple SSL automatically detects your settings and configures your website to run over https. To keep it lightweight, the options are kept to a minimum. The entire site will move to SSL. (Note: If you consider Flywheel as your hosting company, they will give you a free SSL Certificate for every site you host with them – how cool!)
WordFence – The most popular WordPress firewall and security scanner! I highly recommend you have a security plugin installed to protect your blog.
Yoast – I have started using Yoast again. Yes, back in the day, this plugin used to make your site super slow and caused some issues. However, in the last few years they have upped their SEO game and partnered up with SEMRush to help you implement the latest SEO settings, keyword tactics and strategies, so that you can rank on Google (and not rely on Pinterest alone for traffic). Yoast has also improved their compatibility with WordPress.
How to install a plugin
There are two ways to install a WordPress plugin:
From the admin dashboard, go to Plugins > Add New, and use the search box to find what you are looking for.
Or, if you have downloaded a plugin (should be in .zip format), go to Plugins > Add New and then click on the “Upload Plugin” button.
STEP 3: Choose your blog topic/s, niche and do research
Phew! Now that we’re done with all the technical stuff, we can start focusing on your blog niche/topic…
Your blog’s niche, or topic, will determine what type of blog posts you write and which content you post. This will also help you to monetize your blog, because you’ll know which products to promote.
Example: If you choose “fishing” as your blog niche, you can wite about where all the great fishing spots are, what types of lure to use, which fish are easier to catch, what gear you need, etc.
Which blog topic/niche should I choose?
I cannot tell you exactly which niche you should choose in order to make a 6-figure income from your blog.
The truth is this: Any niche can be profitable. It all depends on how you monetize, promote and grow your blog.
Sure there are niches out there that easily make a killing with their blog content — the more “profitable niches” — but the reason for this is because it is easier to monetize them, and the profits are high because they relate to skills that the general online community is interested in (I’ll explain in the example box below). Take note that these “profitable niches” are also highly saturated, so competition is fierce.
Example: Let’s say you choose the profitable niche, blogging. Many people are interested in starting a blog, because they want to earn money with their blog. Also, in the blogging niche, the affiliate programs you promote (hosting, themes, courses) pays well, too. If you decide to offer a course, people will likely pay for it as well, because it is something they want to learn. See how easy it is to monetize?
Here is a list of the latest most profitable niches:
Lifestyle
Food & Recipes
Fashion & Beauty
Online Marketing
Hobbies & Crafts
DIY & Home Projects
Blogging about blogging (BAB)
Finances & Budgeting
Dating, Relationships and Marriage
Pets
Travel (although it went down a bit in 2020, it will soon pick up (and thrive!) once travel restrictions are removed – so if you don’t know what to blog about, get into the travel-blog game right now before everyone else does!)
Health & Fitness
Now, let’s say you want to choose a smaller niche (what we would call “to niche down”). This is where you’ll take a broad topic and make it smaller and smaller to focus on a very specific target audience.
Example: If you’re going to niche down in the “arts and crafts” topic, for example, you can make your target audience smaller by including only “embroidery”. If you want to go smaller than that, you can blog about “embroidery for stay at home moms”. This method has its pros and cons, of course.
To niche down or to not niche down?
To niche down or not is totally up to you. There are plenty of bloggers out there who make lots of income with a broad niche, such as “lifestyle”, and there are those who make tons with a smaller niche, such as a blog about succulents!
There are a few disadvantages with niching down:
finding your target audience will be harder
You might run out of blog post ideas
Monetization is harder
There might be a famous site that will always rank in the top position, and it’s difficult to beat (see my example below)
But there are advantages, too:
It’s easier to sell to your audience, because they are there for that specific reason
It’s easier to rank in search engines, because the keywords you’re using in your posts aren’t that saturated
Example: My other blog is a wedding blog. It’s still a broad niche, but not as big as the other giants out there. Sure, I make money with it through affiliate links, and Etsy sales, but I have to go up against Brides.com, The Knot and Wedding Wire. I have a few blog posts that rank well in Google, but the rest I can forget about. It’s very competitive! (I’ll get to the part about Pinterest for traffic in Step 5)
So, my point is, niching down is up to you. I would recommend that you do your research well before settling on a blog topic, which I’ll discuss next.
The research phase
Researching your niche is a must!
Go into Google and type in the keywords that come to mind when you think about a certain topic you’re interested in. Now scope out the competition (the top ranking sites for those keywords, after the ads and the Google snippet).
If you see top sites there which you recognize, ranking on Google for those keywords might be difficult. So, now you go to Pinterest and do the same….
Click on some Pins for blog posts to see what they are all about. Also try to see how many related pins there are to your specific keyword.
During this research phase, take notes on everything. After a while you’ll discover if the niche is right for you, or not.
Choosing a niche based on how profitable it might be is not enough. You actually need to have an interest in the topic and some basic knowledge about the topic to write about. Why? If your heart isn’t set on it, you’ll eventually give up and the blog will fail.
Keyword research + SEO
Time for some more research…
Once you’ve pretty much decided on a niche for your blog, it’s time for some keyword research for SEO purposes.
SEO, or Search Engine Optimization, is all about the use of keywords. These keywords are what people type into a search engine like Google, for example. Any website with a search box (Pinterest, YouTube, Etsy, even your blog) will make use of those keywords you type in to find what you’re looking for.
That’s why it’s so important to use the right keywords in your blog posts, otherwise people might not find your awesome content even if they search for it!
For your keyword research (and some great analytics) I recommend Neil Patel’s Ubersuggest. Simply log in with your Google credentials and play around with keywords and site analytics.
STEP 4: Publish your first blog post
Now we are getting to the good part of starting a blog: how to write and publish your first blog post.
First, I want you to get a look and feel of creating your first blog post, so go ahead and do that now… It doesn’t have to be The Best Blog Post in the World. In stead, make it a short post, play around with the editor a bit, insert an image or two, and hit PUBLISH! (You can delete this post afterward, or improve it – but just publish it!)
The reason for this first blog post, is so that you can get started. A lot of people create a blog, choose a theme and brand, and… just stop there. There are so many abandoned blogs out there, it’s crazy! (Apparently around 120 million blogs according to Technorati in 2014, but who’s counting?)
The truth is: If you don’t start now, when will you? Don’t worry too much about perfection right now – launch now, perfect later!
What should my first post be about?
There are literally tons of blog post ideas out there, but if you have no idea what your first official blog post should be about, make it personal.
You can write about who you are, your journey, why you started a blog, why you started this blog, what the future might hold for you, among other things…
Bulk create + schedule ahead
Your ultimate goal right now is to get as much high quality content out there as possible – and fast! Blogging is such a competitive business, that you need to be ahead of the game at all times.
I highly recommend that you bulk create as much content as possible for your blog, and then schedule it ahead in WordPress.
Have a checklist for before and after publishing
As you start to write more and more blog posts, you’ll discover that there are the same things that need to be done for each blog post before and after hitting publish. These might be things like:
Checking for spelling
Seeing that all links work
Linking to reliable sites
Revising a few paragraphs
Sharing after publishing
etc…
You can easily create a little checklist for yourself and whenever you’re ready to publish a post, go through that checklist.
STEP 5: Plan, Create and Promote!
Don’t just sit there and wait for your blog post to magically go viral… It will take very long for Google to start ranking your new post. In the meantime, rather share your content immediately with the world while focusing on creating more and more content.
The content planner
To effectively plan out your blog posts and what you should write about next, I suggest you create a Content Planner. You can use your planner or create a Trello board for this.
Your content planner should include dates for when you plan to publish your posts, when you plan to do research and write them, when and where you plan to share them, etc. You can make your planner as basic or detailed as you want.
Where to find inspiration for blog post ideas
Writers block is very real, even for bloggers! That’s why it’s important that you have endless sources where you can find inspiration for your blog posts.
Here are a few places:
Pinterest (browse through your feed or use the search box)
Instagram (search for tags, accounts in your niche or browse through your feed)
Quora (someone likely asked a question about something in your niche so do a search and write a blog post about that question)
YouTube (view channels and videos in your niche for some ideas)
Wikipedia (these pages can teach you a lot about a topic, so read up!)
Extremely important side note: Never copy someone else’s hard work! By inspiration, I mean: what are they doing that inspires you to come up with your own great ideas?
Manage your blog like a project
I have briefly mentioned Trello, but any project management tool such as Trello, Asana or ClickUp are perfect for managing your blog like a project! You can plan out your blog content, pages and to do lists with these platforms so that you can get an overview of everything that needs to be done. Try them all out and see which one you like best. 🙂
Where to promote your blog posts
When asking where to promote your blog, most people immediately refer you to social media. It’s a great starting point and quite sustainable.
However, there are other places to promote your posts, too. Think broader: online forums, blog feeds and other people’s blogs in the form of a guest post.
You can also ask other bloggers to link to your posts in their posts by reaching out to them. This is what we call “backlinks”, and Google also considers this as a ranking factor – the more backlinks you have from legitimate websites, the higher your chances of ranking will be.
Which social media platform is right for my blog?
Each social media platform serves a different crowd and purpose. And let’s not forget about Pinterest (which is in actuality a search engine), but it’s a great place to start if you’re new to blogging.
Pinterest can become a goldmine for blog traffic, as long as you use it properly. Avoid spammy behaviour, and have a Pinning strategy in place. Make sure you include valuable keywords (SEO) in your Pin descriptions so that they can be found in search.
As an extra strategy you can use Tailwind to schedule out your Pins. Tailwind is great for planning your Pins ahead of time, plus this handy tool schedules your pins to publish at the optimal time — when your potential audience is active on Pinterest.
Tailwind also has a “tribes” feature (now called “communities” because of ethical reasons), where users can share and pin each others pins to their own boards for maximum effect.
Each social media platform comes with its own strategies and challenges. It’s best to do some research on each platform before diving right in.
The Art of YouTube
Many bloggers have a YouTube channel for extra traffic to their blog.
How?
By making a video about the blog post they’ve just written and linking to the post in the description box! Works like a charm!
STEP 6: Tweak and perfect - the more complicated stuff
Once you’ve got the hang of blogging, you can dive into the more complicated stuff.
Complicated things tend to change on a regular basis, so make sure to do frequent research on each aspect and stay updated.
Page Speed
Your site’s page speed has long been a ranking factor in Google, until it wasn’t, and now it is again…
But this isn’t actually just a Google thing.
People are impatient beings, so if your site takes too long to load, they will close that page and go somewhere else. (In Google terms this would be called the “bounce rate”. And the higher your site’s bounce rate, i.e. how quickly people leave your site + measured over time, the lower Google will rank your site).
Increasing your site’s speed can become a challenge when there are too many things that slows it down. You can improve your site’s speed by using certain plugins and making sure your image files on your blog are small (use JPG instead of PNG), among other things.
Analytics can become as basic or complicated as you want it to be. There are people who are magicians with analytics (I’m defo not one of them!). You can always teach yourself the ropes of Google Analytics by taking a course or searching in YouTube.
As for me, I like to know the basics: how much traffic I get, where it comes from, and to which blog posts…
A/B Testing
A/B Testing can be applied to nearly everything (even your Pin designs) and what it basically is, is that you test one version of something against another version to see how well it performs.
You can do this with your blog posts, too: You can write two posts on the same topic, but change the content and layout, place your opt-in forms at different places and use different images. This way, you can get an idea of how your readers navigate your posts, where they click, etc.
The Pixel
Have you ever gone to the website of your favorite clothing store, only to find a Facebook ad for that exact same clothing store in your feed? Yup, you’ve been pixeled!
A pixel is placed in the user’s browser in the form of a “cookie” that will gather data on that user (usually non-sensitive data such as country, gender and browsing habits). If you use Facebook ads, you can use this feature to target a specific audience — if they went to your site, you can advertise to them again to push conversions and sales.
Pixels are great for targeting your ideal audience, but it is a more advanced strategy, so make sure you get to know it a little by researching.
A final word on being unique with your blog + doing your own thing...
Can you really build a blog that is unique and stands out from the rest? Absolutely — but you need to stand out from the rest in a good way.
Standing out in a good way doesn’t always mean standing out visually. Sure, you can create a beautiful blog (or pay someone to do it) and be memorable in that way. Aesthetics can speak volumes! But if the content isn’t that great, what is the point?
In any case, if good design isn’t your strong point, you can certainly stand out in many other ways, too. Ask yourself these questions: What will set me apart from other bloggers in my niche? In what way will I provide value to my readers? How can I provide info that will help my readers get results?
So my winning recipe for a good blog is:
provides value + easily readable + gets results
bonus: good design
(this recipe will also help you to make more sales from your blog)
My key takeaway from this is that you should perfect your blog later. Get your content up! Make sure it is good and gives value to your readers! Try to give content that is actionable + get results, wherever you can! Make sure your content is good enough for your readers to stick around! After that, you can focus on how “pretty” your blog should be. ♥
Tanya Viljoen
Hi there! I'm Tanya, the owner of this blog, and I love teaching people how to start and run a creative business online. Whether you’re interested in starting a blog, selling digital products, or anything in between, stick around!
Hi there! I'm Tanya, the owner of this blog, and I love teaching people how to start and run a creative business online. Whether you’re interested in starting a blog, selling digital products, or anything in between, stick around!